Popular Posts

Showing posts with label St. Patrick's Day. Show all posts

Leprechaun Hat Treats

Happy St. Patrick's Day!
St. Patrick's Day is a very special day in our home.  My husband treat it more as an anniversary than we do our wedding, considering it is the same day that we met.  Quite surprisingly, considering we lived on opposite sides of North America at the time.

So as I was finishing up an Easter project I'll be sharing with you soon, 
THIS idea popped into my head...

A super fun and simple treat to help celebrate St. Patrick's Day!
I will apologize now sharing this at the last possible minute in preparation for the big day...
it really was an after-thought!

I'll also apologize for the lack of photos.  But, it was so simple to make, I hope you don't mind reading the instructions if you even feel they are necessary to create your own.


Leprechaun Hat Treats

Supplies Needed
- SOLO Clear Plastic Cups
- Sugar Cookies
- M&M's, green & brown
- Icing Glue (see recipe below)
- Paper, yellow or gold
- Glue
- Gold Glitter optional

Directions
1. Prepare Sugar Cookies
I use THIS recipe, but any recipe will do.  Add enough green food coloring to get the shade you like. I roll mine between 1/4" and 1/2", then cut circles with a small bowl or large cup.  You want a circle that will be slightly larger than the open mouth of the SOLO cup.

Let cookies cool completely!

2.  Prepare Icing Glue
I use the same recipe as I would for gluing together my gingerbread houses.

Icing Glue
- 2 cups Powdered Sugar
- 1 Egg White
- 1/4 tsp Cream of Tartar
- Green Food Coloring

Combine the powdered sugar, egg white, and cream of tartar in a bowl and mix well (I use my hand blender).  Add a little bit of green food coloring to get the color you want.  If the mixture is too dry, add a little bit of hot water until you get the right consistency.  If the mixture is too wet, add more powdered sugar.

You want the icing to be thick enough that it will hold it's shape, but not so thick that it is impossible to squeeze from a piping bag!

Transfer your icing to a bag (a ziplock bag will do).
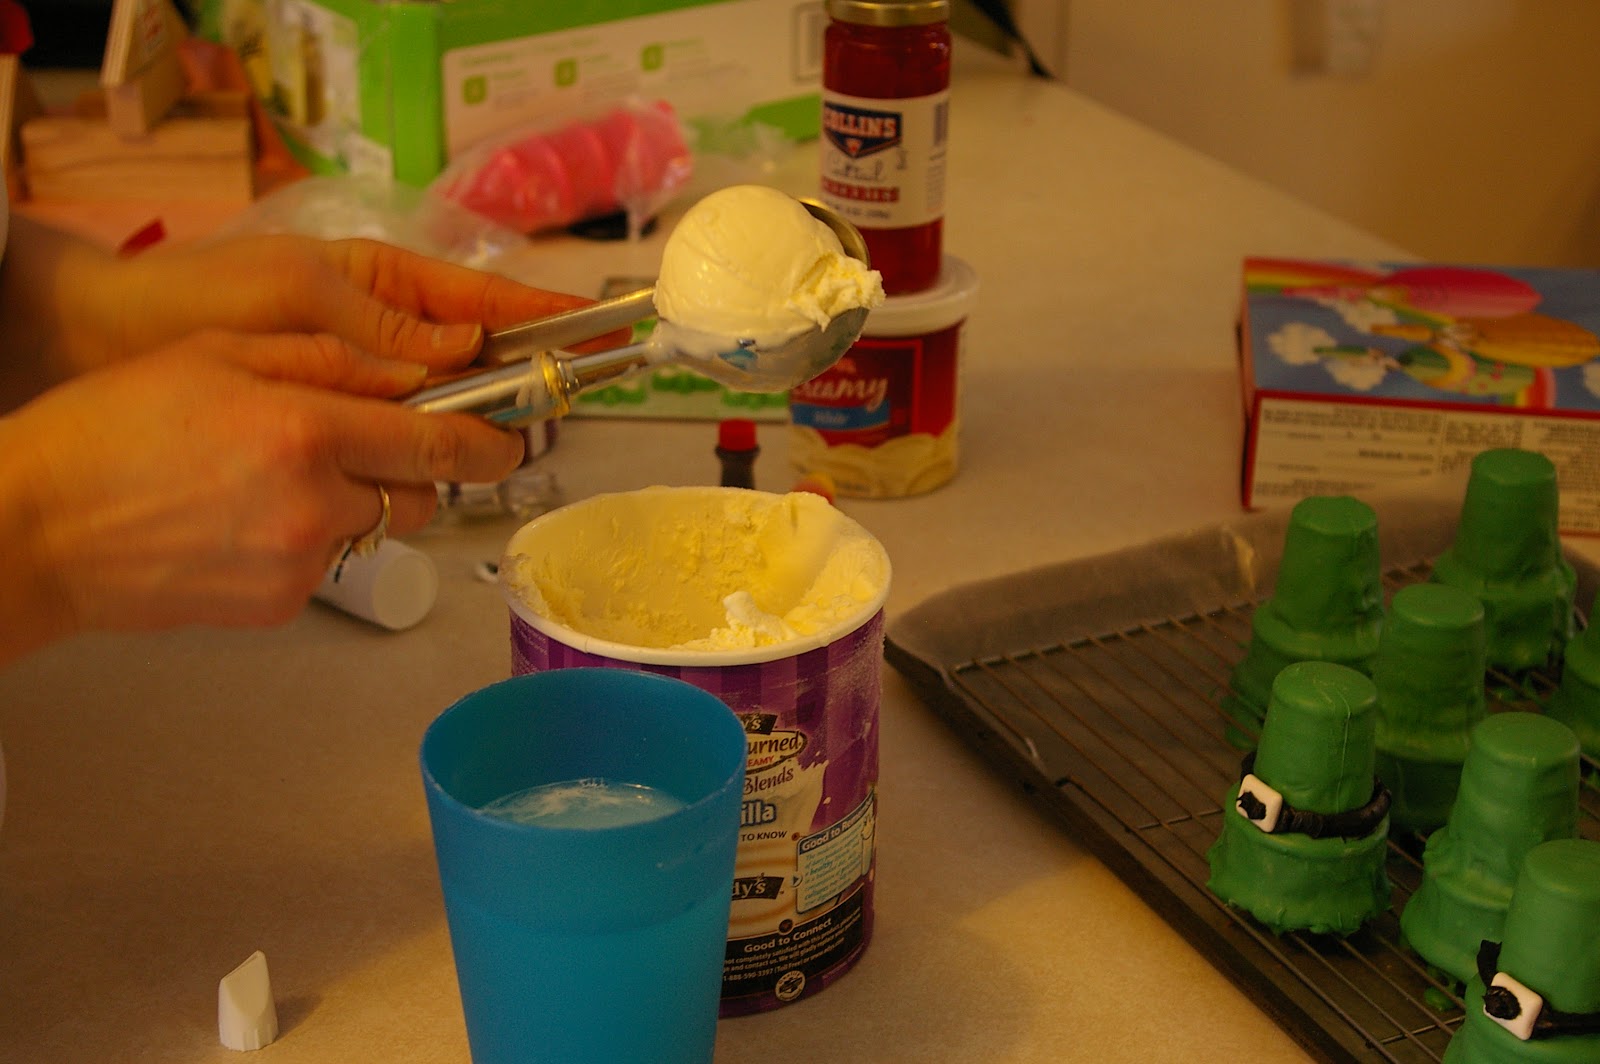
3. Fill Your Hat
Fill your cup with green M&M's.  I chose to add brown M&M's at the top of the cup to create the band of the hat.  Fill the cup full, so that the M&M's won't have much wiggle room once the hat is put together.

4. Glue it Together
Snip a small bit off of the corner of your icing glue piping bag.  Run a line of icing glue around the rim of the cup, as in the photo below:
 
Yes.. I know.. work with me here!
This photo is for the next project I will be sharing with you... but same idea applies.
Pretend this cup is full of M&M's and has green icing glue, not white.

With the cup sitting upright on a flat surface (so your M&M's don't fall out) place your cookie on top of the iced cup rim and gently press into place.  You may want to leave your hats upside down like this for several hours, until the icing completely dries... gluing the cup to the cookie.

You will then have this....


5. Add a Buckle
I cut a rectangle out of yellow card stock, cut a smaller rectangle out of the middle, covered it in glue, and poured gold glitter over top.  However, you could even pipe yellow icing directly onto the cup to create your buckle!  When my buckle was dry, I used some of my extra icing glue to attach it to my hat.

And here it is... 

A simple, sweet treat for this St. Patty's Day!
Don't forget your green!


St. Patrick's Day Inspirartions

Do you have any fun traditions for St. Patty's day?  It is a very special day in our home for several reasons.  It happens to be the day that I met my husband.  We always try to make it a special day in our home to celebrate how lucky we are.


Here is a collection of ideas I've found inspiring... and I hope you do too!!
And, be sure to check out my
St. Patty's Day Inspirations from last year here HERE.


here at Sun Scholars


here at Sun Scholars

at TinyPrints

shamrock drops
at Disney Family

at Snap Dragon & Ginger Roots

932ed710-0882-012d-ecf4-0024e85002a7
at cocodot

at Cheeky Kitchen

at Skip to my Lou

at Secrets of a Super Mommy

at Kid Giddy

at Moments of Mommyhood

at Our Best Bites

at eighteen25

Free Printable St. Patrick's Day Cupcake Toppers
at The Cupcake Blog

at B. Inspired Mama

at Finley & Oliver

Photobucket
at Little Wonders Days

Photobucket
at Shindig Parties To Go!

IMG_9295.sharp
at I am Baker

at Oopsey Daisy

funfood34
at Meet the Dubiens

at The Teacher Wife

SPG12
at Yesterday on Tuesday

leprechaun trap rainbow cakeleprechaun trap rainbow cake
at Not Martha

at Amanda's Cookin'

Shamrocker  a garland of hand cut hearts and custom banner St Paddys day
at Etsy by PaperPolaroid

at Design Sponge

at Hello, Good Gravy!

Green Pepper Pizza
at Quick Dish

And... no St. Patty's Day would be complete without...
at RVA News


Happy St. Patty's Day!!!

Ice Cream Leprechauns

Let me just say...
I am SOOOO excited to share this one with you!


I know you want to make them!  So here is the tutorial!


Supplies Needed:
-  Vanilla Ice Cream (note, I used frozen yogurt.. I think regular ice cream would have been a better choice)
-  1 Pkg Green Candy Melts
-  Ice Cream Cones (I used the colored cones)
-  Black Decorating Frosting
-  Vanilla Frosting
-  Food Coloring, red and yellow
-  Gum, in the little rectangles, not sticks
-  Cocktail Cherries
-  Rainbow Decorating Sprinkles OR Mini Chocolate Chips (for eyes)
-  Cake Decorating Shamrocks (optional)
-  Toothpicks, broken in half

Directions:
Ok... so you have a choice.  You can go the easy, less messy, less work, less expensive route and simply use the green ice cream cones that you can buy at the store.  If you choose to do it this way, skip down to Step 4.

OR... you can use any color ice cream cone, melt your green candy melts, and make your little leprechaun hat green that way.  The choice is yours.  Here is the more messy, more work, more expensive, but super fun way!  Follow from Step 1 below, if you're up for it!

Step 1
Prepare your cones.  I found that it worked well to line a baking sheet with wax paper.  I placed my cones on top of a cooling rack set inside of the lined baking sheet.

Step 2
Melt your chocolate melts according to the package instructions.  I used an entire package of melts to cover 8 cones.  Be careful not to over cook your chocolate!

Step 3
Using a spoon, pour the melted chocolate over each cone, allowing it to drip down and cover the sides.

After pouring chocolate on the top of each, I found it helpful to pour chocolate around the perimeter, then fill in spots where needed.

Maker sure your cones are completely covered with chocolate, and allow them to set until the chocolate has hardened.

Step 4
Time to add a black band on your Leprechaun hats.  I would have used this tip if it had fit onto the frosting bottle.  This was not the case.  Ugh!  So, I had to resort to a Ziploc bag.

I squeezed a bunch of the frosting into a Ziploc bag, and snipped the end.

Add a band of black frosting around each of your hats.  Here, you see the green colored cone (not covered in chocolate).

Add a little black frosting to the middle of a piece of gum, and stick it onto your hat.  VoilĂ !  You have a Leprechaun hat!

And here you see some finished hats that were covered in the chocolate.

Step 5
Some important notes to the rest of the instructions.
For the best results, work fast and work COLD!  The colder you can keep your ice cream, the better.  If you have a deep freeze, even better!  It will keep your ice cream colder than a regular refrigerator.  Of course... I did not have that as an option.  Also, if you can manage to keep each Leprechaun on an individual dish, this would make it so much easier as well.  That way you don't need to handle them more than necessary, and can take one out at a time.  

Keep a cup of warm water ready.  This will allow you to mold your ice cream balls and keep the ice cream from sticking to your spoons.  

Using two spoons (one of mine was an ice cream scoop), make an ice cream cone sized ball of ice cream, trying to smooth it as best you can.

Add your ice cream ball to your Leprechaun hat, using the nicest side for the face.

Place it on a tray and immediately place it in the freezer.

Here are my Leprechauns, freezing up as I work on the  next...

I would recommend allowing your Leprechauns to freeze for an hour at this point.  The more solid your ice cream is for the next step, the easier they will be to complete, and the better results you will get.

Step 6
I used store-bought frosting.  You could just as easily make your own decorating frosting.  I ended up adding some powdered sugar to this after the fact, finding that it worked a little better.  You may want to do the same.

Tint your frosting to get an orange color that you are happy with.  I used a 2:1 ratio of yellow to red dye.  With the regular food coloring, I used 30 drops of yellow and 15 drops of red.

Add your orange frosting to a piping bag with a large circle tip, or to a Ziploc bag like I have, and cut the corner.

Step 7
Again, if you can, work with one Leprechaun at a time, that way your ice cream doesn't get too soft.  Using your orange frosting, make a beard by squirting dots of frosting, or by squeezing zig-zags.

I would have added hair all around, but my ice cream was getting soft pretty fast (1 - I was using frozen yogurt, and 2 - I didn't allow it to completely freeze before this step... Ack!).  You may want to add hair to yours too.

After the beard, I added some bushy eyebrows.  Aren't they cute?!

Step 8
Time for the nose!!!  Cut your cocktail cherries in half.  I placed them cut-side down onto a paper towel to suck up some of the extra juice.

You could attach these with more frosting.  I opted for breaking a toothpick in half, and using the toothpick to secure the nose to the ice cream.  If you are giving these to young children, you likely would want to use frosting or make sure the toothpick is removed before the little ones get them!

Step 9
Add your eyes!  Actually, this would have been easier had I added them before the nose.  The little candy sprinkles aren't the easiest to handle.  You could also use mini chocolate chips, poking the pointy end into the ice cream.  I first tried to make frosting dots for eyes, but wasn't happy with the results (I needed a smaller tip, or they would have been fine).  It is up to you!

Step 10
Last, I added some frosting to the back of this candy shamrock, and attached it to the hat.  And your ice cream Leprechaun is complete!  Leave it in the freezer until ready to enjoy!

I can't wait to share these with my kids tonight.  They will be a special treat, for sure.

Happy St. Patrick's Day!!  Enjoy!