Popular Posts

Showing posts with label math. Show all posts

Puzzlewich - Feed Your Brain!

I am thrilled to be featuring Shelisa from a great educational (and FUN) blog called Think Magnet!  Her blog is full of creative and simple ways to incorporate learning into the home.  I love how her posts are short and sweet... and many ideas shared can be done with the things you already have on hand.  She also shares some great advice on how to parent learners within your home. Be sure to stop by and see what great things Shelisa is sharing at Think Magnet!

Some of my personal favorites over at Think Magnet...


1) Sweet Spelling                                   2) Snow Day Science
3) Think Boards      4)  If You Give a Dog a Donut Book Club


~*~*~*~*~*~*~*~*~*~*~*~*~*~*~*~*~*~*~*~*~*~*~*~*~*~


FEED YOUR BRAIN!
It's the simple, easy teachable moments that become my favorite. My husband grew up with puzzle sandwiches. I love continuing this tradition.

   
 A food for thought chance to practice spatial reasoning, geometry, problem solving and PATIENCE! Also, buys you some time while you're busy filling drinks, cutting up fruit, or actually sitting down to eat your own lunch. When your child is old enough, have them design and cut a puzzlewich for you!

   
 Apply food puzzling to other foods like pizza, breakfast toast, cheese slices, and tortillas!

 
I also recently broadened our Puzzlewich tradition in creating a Tangramwich! You are what you eat...so what if you eat puzzles.

Happy Puzzle Eating!
Shelisa

Lemonade Stand Learning

It is a hot, summer day, and your children ask if they can set up a lemonade stand in front of the house.
You say "Sure!" thinking it may keep them busy outside while you get some things done around the house.

But...
Did you ever stop to think of what an AMAZING learning opportunity this is for your children?
No?
Don't feel bad.  I'm sure most people haven't.
Therefor, let me share some of the many ways your children can learn through this fun, summer activity.
I've brainstormed a list of ways you can make your child's lemonade stand more than just "something to do" on a hot, sunny day!  If you have any other ideas to add, please share them!!


Check out the amazing lemonade stand my husband and father-in-law built for my kiddos!
They built it.  I painted it.  The kids create signs depending on what they are selling that day.

They even have a great counter space and storage for coolers below to keep their juice out of the heat.


How Lemonade Stands Can Promote Learning

Language
- Children can practice reading and writing skills by creating their own signs and posters.
- Your child can practice reading and writing by creating a shopping list of the items they will need.
- Children can read labels and follow the directions when making lemonade and other items they might sell at their stand.
- Encourage your child to write down ideas for items they could sell or the supplies they will need to gather.
- Have your child create a plan for their business.
- Critique at the end of the day:  What went well?  What did not?  What would they do differently next time?  Would they do it again?  Did they make a profit?  Was it fun?

Mathematics
- Help your child determine prices, and what the costs for each item is.  What is their profit at their chosen price?
- Calculating sale totals and counting money at the end of the day.
- Your child will need to know their coins, their value, how to count money, total a sale, and how to make change.
- Have your child keep track of their time, their sales, inventory, and customers each day.
- Children use math when following recipes!  How many cups of sugar, lemon juice, or water to make a pitcher of lemonade?
- Can your child calculate how many cups of lemonade they must sell to earn a profit for that day?
- How many cups of lemonade will your child be able to sell from each pitcher of lemonade?
- Let your child find ways of decreasing their costs.  What package of cups is the most cost-effective decision?
- Is it less expensive to make lemonade from scratch, to buy pre-made, or concentrate?  What are the price differences?

Social/Life Skills
- Shopping!  Let your child play an active part in making the purchase decisions.
- Interacting with customers is a great way for your child to practice their social skills.
- Preparing Orders/Drinks - following directions!
- Using manners and learning how to provide friendly, quality service.
- Counting Money
- Encourages Teamwork (if working with other children)

Art & Creativity
- Do you have a name?  Have your child come up with a catchy name for their lemonade stand.
- Creating signage.  Let your child create special artwork or posters to promote their stand.
- What makes your lemonade stand different?  What can your child do to make sure their stand is noticed?
- Ask your child what might attract people to their stand?  Do they sell something unique and interesting?
- Perhaps your child has designed or created their own stand, or played a part in doing so.

Business Sense
- Children can determine how to market their stand or their products.
- Determining the best prices and products to sell.   Do you just sell lemonade?  What is "your strategy"?
- What times are the best to sell?  Where is the best location?
- What will people want to buy?
- Have your child consider, "Why would people want to buy my __________?"
- Have your child critique their business when all is said and done.  (refer back to language)

Social Studies
- When would people be most likely to buy your products?  Are there times of the day or days of the week where you are likely to get more patrons?
- What kinds of things would people be most interested in buying where you live?  Are there lots of kids, or more adults?  Do people prefer sweeter drinks, or would cold water be more popular?
- Is your home a place where you would get enough traffic to make it worth while?  If not, is there another place you might be more successful?  Would a mobile stand be possible?

Science
- How hot is it outside?  What will you need to keep your products cool for your customers?
- Does the temperature outside effect your business?  Are there more or less people out in the heat?  Do your sales increase with the temperature?

Health
- What do you need to do to keep your stand a healthy environment?  Do you use gloves? Wash hands? etc.
- Do you have food items that will be unsafe to eat if they are not kept cold? or not cooked well enough?
- What about your child's health?  Do they have something to provide shade on a hot, sunny day?  Are they covered with sunscreen and adequately hydrated if they are out selling on a hot day?
- Do you want to offer healthy food and drink options at your stand?  What might those items be?  What makes them healthy choices?


Here's to Summer Fun and Learning!!

Summer Scholar Sunday #4


Each week, I will feature an activity found in the Sun Scholars Summer Program and share some highlights from our Summer Scholar Families.  We'd love to have you follow along.  If you like what you see, and would like to learn more about my Sun Scholar Summer Program, click HERE.


Beach Bucket Cake
Subjects:    Life Skills & Math
Time:         15+ mins
Supplies:       Yellow Cake, Plastic Bucket (that holds 8-9 cups), Vanilla Pudding, Graham Crackers (1 cup crushed), Chocolate Shells, Plastic Shovel

this is from Week 6 - Beach Party of the Sun Scholar Summer Program

What a fun way to celebrate summer with your children!  This cake in a bucket is SO easy to prepare, you can practically leave the kitchen to your child.  This is sure to be a crowd pleaser!

Directions
      1.       Give your bucket and shovel a good wash before use.
      2.       Tear (or cut) the cake into 2” chunks.  Place a layer of cake chunks in the bottom of the bucket.
      3.       Spread a layer of pudding over the cake chunks.
      4.       Repeat steps 2 and 3 until all the cake has been used, ending with a layer of pudding.
      5.       Sprinkle the crushed graham crackers over top to create the ‘sand’.
      6.       Add some chocolate shells (and perhaps a plastic crab?), your shovel, and dig in!

Tip:  To crush your graham crackers, place them in a Ziploc bag and gently roll over them with a rolling pin until they look like sand.


What have the Summer Scholar Families been up to?


Amy
This week we chose Mice, Cookies & More. We love the Laura Numeroff books and read them over and over. So I knew the kids would really enjoy this week's activities.

The activities we did this week were:
Story Time: If You Give a Mouse a Cookie
Chocolate Chip Math
My Family Portrait Retell the Story
Crazy Crayons
Homemade Cookies & Milk
Chocolate Chip Hunt
Story Time: If You Give a Pig a Pancake, If You Give a Moose a Muffin & If You Take a Mouse to the Movies
Mouse Scavenger Hunt
Write Your Own Story
Color Changing Milk


This was such a fun week for us. The kids loved all the activites, especially those involving chocolate chips. The Crazy Crayons were a great way to use up all our broken crayons, which we always seem to have plenty of. We are going to use the rest to make the Colorful Crayon Sun Catchers today. A great rainy Sunday afternoon activity.

Hopefully the sun will come out to shine through them when we are done.  Princess is a budding artist/author/teacher/doctor, it depends on the day, so she really enjoyed the Family Portrait and Write Your Own Story activities. The Scavenger Hunt and Homemade Cookies & Milk were a big hit with my younger boys. Smash & Dash easily found the items they were looking for thanks to the pictures on the cards.
Handsome thought the Color Changing Milk was amazing and they all did this project over and over. Good thing I had extra milk on hand!

I had a great time this week, all the activities were fun, but I loved the Retell the Story activities. My older two are advanced on their reading levels but really need to work on their comprehension. So, this will be a great activity to use year round. Thanks for the fun week!! We're hoping the weather cooperates for outdoors or beach week next time!!


Melissa
This week for our Summer Sun Scholar Program we used the Unit called Animal Fun!

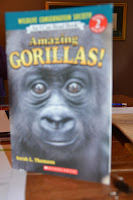
Story time: We read a story called GORILLAS. It was a non-fiction book that gave us A LOT of details we did not know about these amazing primates!  It surprised the children to know that Gorillas have thumbs and fingers just like we do.  One exercise that I had them do was try to pick up a pencil and write without using their thumbs. It was FUN, hard, but FUN!  They also banged on their chest like Gorilla's do to ward off other animals.    They knew that they could never have a gorilla as a pet.

Lost Pet Poster: For this assignment they had to pick any animal that they imagined as their pet and create a poster to hang up as if the pet was lost.  Molly picked a Cow and called it Molly.  Zachary picked a Cat (our cat) and called him Jobbie (long O sound - our cat).  They created the posters using large sheets of paper, although there are templates in the program to use.  They came out cute!  I put all the "info" on them once they did their animal pictures.

Learning about Animals: This week we studied Ants. While Ants are technically Insects, we used them for this exercise because they already had knowledge of the Ant.  The described the ant by labeling the parts of the ant on a worksheet.  We talked about Fire Ants also and they drew pictures of the fire ants and their nests.

Movie Party Planning: This was a fun activity especially since I had already planned on showing an outdoor movie on our big screen for Memorial Weekend.  I gave the kids a few movies to pick from as our "Now Showing" movie. They picked Toy Story.   We talked about how many children will be inviited and how many bags of popcorn we should make up for them. Zachary suggested we also have juice boxes available.  We made a shopping list of what is needed and we will go on Saturday morning to get all our supplies. (look for pictures to come on this Sunday Morning on our blog)

Additional Story Times:  In addition to the Gorillas we read inthe beginning of the week, I pulled out some simple readers by Scholastic for Zachary to read TO US and show us the pictures. He read several books on animals to us.

This unit was fun and I can see us doing the Movie Party Time assignment over and over several times this Summer!


Heather
Can you believe, I get a note from Heather telling me she had her baby girl last Tuesday, got home Friday, and was hoping to have something to send to us this week?  Oh my goodness..... ha ha.  Heather, I just want to say CONGRATULATIONS to you and your family on your new addition!  Every mom out there will completely understand if you are dedicating your time to your new baby and your family's needs before sending us updates.  We hope you and baby are happy and healthy!


Emily
Homemade Cookies & Milk.  We started the week out by my daughter and son making cookies for the family.  It was a so sweet to see them work together and it was the first time they had cooked all by themselves, I was in the kitchen cooking dinner.  I was able to help out a little, like what a tsp was.

Chocolate Chip Math.  The kids had fun counting the chocolate chips and eating them.  We got a bunch of different kinds, so the kids could add the dark and milk together.  We did this a couple of times this week.  When the kids were getting bored and needed a treat we would count again.

My Family Portrait.  It was fun to see how the kids see our family.  Each picture was so different and loved how they named all the people.  In one picture, I was the smallest person.  I guess size is in the eye of the beholder. 

Learning about Mice.  I really enjoyed the fact sheet that was included in the printables.  I learned stuff I never knew and my sister and kids thought I made it up.

Chocolate Chip Hunt.  This was an afternoon treat, and it was super fun.  When my kids had made the cookies they got to choose what to put in them.  So they choose three different flavors.  It made fun tasting cookies, but the hunt was more exciting then it would have been if I had made the cookies. :)

Color Changing Milk.  My kids really loved this and they asked to do it again.  I was surprised by the reaction of the soup and colors but it was really fun.

This week was fun. We read “If you Give a Mouse a Cookie” and also “If you give a Moose a Muffin.”  We love the moose one more and then the kids wanted to do some of the activities that were in the book.  So we had to have a puppet show.

Sun Scholars

Thanks to the Summer Scholar Families for sharing with us.
We'll see you back next Sunday for more Summer Scholar fun!


Daisy Chain Count Down

 Only 13 days of school left for my kiddos.
To mark these last days, we made these daisy chain count downs.
WAY more fun than a paper chain count down if you ask me... and who doesn't have a pile of plastic eggs laying around from Easter?!


Supplies Needed:
-  Flowers (I printed them on card stock), you can find mine HERE
-  Plastic Eggs, one half for each day
-  Small Candy, Toys, or Notes, one for each day
-  Green Ribbon or Yarn (I used about 5' for 14 flowers)
-  Glue (I'm going to recommend hot glue here)
-  Sharpie Marker

Here's the stuff I started out with...


Directions:
1)  Cut out one flower for each day.
2)  Tie a loop at one end of your yarn so that you can hang it, and then lay it out in front of you.

3)  Make sure your goodies fit into your egg shell halves.

4)  See what I'm doing here?   Yeah.... DON'T DO THIS!!!!
I mean, DO do it, but not in this way.
NOTE that I have placed the flower under the yarn.  This you DO want to do!

And then I'm placing my candy filled egg shell onto the Elmer's Glue.
Why, you may ask, was this a bad idea?  Well, the Elmer's Glue was taking FOREVER to dry!
I'm all about instant gratification when it comes to things like this.

Here is the idea on how you're building your chain.

However... I had to resort to...
My glue gun!  Ok, so not as kid-friendly.  But it worked so much better.

So I filled each egg half, lined the edge of the egg shell with hot glue, and placed the egg shell in the center of each flower, with the yarn running in between.

And then I had this...

5)  I used the Sharpie to add numbers (one at the top) in the center of each "flower"

And here is the finished Daisy Chain Count Down!
He really is excited about this... the sun was just in his eyes.  Promise! ;)

After the fact, I thought it would be even cuter with some leaves here and there.
So here is the chain with the leaves...


Cute, don't you think?
Each day after school, the kids can cut a daisy from their chain and enjoy a special little treat.

I also thought that these little paper cups would have been great in place of the eggs.
Perhaps they would have worked better with the Elmer's Glue, and been a better project for the kids.  I did the project above with my Girl Scouts, but did all the hot gluing for them.

Another nice thing about these little paper cups, is that you could cut paper circles and add the numbers to glue onto each.

Happy Last Days of School!

Welcome Spring! Bird Nest Snacks

Are you ready for spring?
I am not only ready... I'm getting impatient!
Here is a fun and simple treat you and your kids can make that I'm sure you'll all enjoy!


Adorable!  Don't you think??
These are so simple to whip up!


Ingredients:
-  2 Cups Chinese Noodles
-  1 Cup Rice Krispies Cereal
-  1 Cup Mini Marshmallows
-  1 Pkg. Butterscotch Chips
-  Peeps
-  Jellybeans or other Egg-shaped Treat
-  Wax Paper

Directions:

Step 1
Empty the butterscotch chips into a microwave safe bowl.  Follow the package directions to melt them, mixing them until smooth.

Here is mine after it's first minute in the microwave at 70% power.  I stirred, and put it in for another session.

I was melting the butterscotch chips while my son helped with this step..

Step 2.
In a separate bowl, measure out your Chinese Noodles.... 2 cups


Add 1 cup of Rice Krispies cereal.  You might need to taste them to make sure they are good.  Wesley gave his approval.

Pour the noodle and cereal mix into the melted butterscotch chips.

Add your marshmallows, and gently stir until everything is well coated with the melted butterscotch chips.

Step 3
Drop a large spoonful of the mixture onto a baking sheet lined with wax paper.  Try to mash down the middle and build up the sides to look like a nest.

Step 4
Add a little birdie (peep) and a few eggs to each nest.  It may be hard to resist them at this point.  Luckily... they just need to set for a bit so the butterscotch can harden.  Set them aside on the counter and they will be ready in a matter of minutes!


And there you have it!


SOOOO Cute!
And let me add, very yummy!

**Note**
This recipe made 6 bird nests.  You could make them much smaller, getting more from a batch, and omitting the Peeps... so you'd just have little nests with a few eggs.  I just couldn't resist using the Peeps.


ENJOY!