


6) Closing it off...
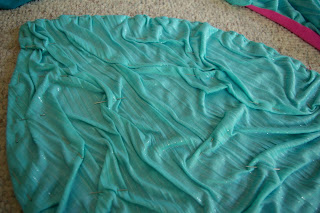
This part looks a little tricky, but that is only because you have the hood/fins pulled out of the way. Open up your tail/cover-up fabrics so that you can match the open edges, right-sides together. You will be sewing one long seam to close the mermaid tail fabric, continuing on to close the cover-up. This seam will run along the back of the finished garment.

I pinned right-sides together of each fabric, making sure that my seams matched where the two fabrics met. See my image below...


Make sure your hood/fin stays out of the way, and sew along the back with a seam allowance of 5/8" or more.
When you are done, turn your fabric right-side out, and tuck the mermaid tail fabric inside the cover-up fabric, like shown below...

6) Now for those fins!
It is really hard to see in the images below, but here is the process...
Pull your extra fin fabric into the fin, so you can see the nice line of the fin from the seam. I added some little bunches here and there with no real order until I was happy with the result. Add lots of pins to hold it all in place. (The pins are in the pictures below... I promise!! Just impossible to see.)

Next you are going to sew a design onto the fin to hold your bunches in place. I chose to do this with my machine in a leaf-vein pattern. You could be more exciting then I was, and try to add some swirls instead... I didn't have a machine with a free-motion option for this project.
I ran one seam down the middle of each fin from the point to the base, then added several 'V's along the middle seam to secure the rest.


7) Around the edges!
I thought it was a nice finishing touch to add a 1/4" seam along the edges. You may or may not chose to do this. On the second garment I decided not to go around the fins, but sewed along the seam line of the fins instead (where the fin fabric and mermaid tail fabric met).
First, pin along your seam lines like I did below.

Then sew...

8) Ready for some arm holes!
NOW we are going to cut the arm holes. I folded my garment in half to match my pattern template and sketched the arm hole with a pen. (In the image below I had already cut the first arm hole... I just wanted you to be able to see the hole in the template since the red and dark pink mermaid tail fabric were so similar.)

Once you have traced your arm hole, cut it out of both the mermaid tail and cover-up fabric layers. Here I have cut one arm hole, so you are seeing the other side of the garment through the hole. I also gave myself an extra 1/4" to allow for the bias tape seam.

I found it helpful to add a seam along the edge of the arm hole to keep the fabrics in place. Cut the second arm hole, and add a stitch to secure it as well.
Turn your garment so the mermaid tail fabric is on top (cover-up fabric is inside). Pin the bottom of these two fabrics together.

Next, you need to mark four equal sections on this garment, and both the skirt pieces from Part 1 of the tutorial. Use your seams on each as your "back", pin the opposite as your "front", and pin the right and left sides of each by matching the front and back points together. (Again, sorry the pins are so hard to see... but they are there!)

Next you need to place these three pieces together, pin them in place, and sew! Keeping track of the back seam of each (these will all be pinned together), match your quarter sections. Place the longer skirt piece inside the mermaid tail garment, and the skirt waistband on top. Make sure the edges of these three pieces are lined up nicely.

Sew the three pieces together with a zig-zag stitch, using a 1/2" seam allowance or more. Make sure your securing zig-zag stitches are out of the way so they don't show up on your finished garment! As you sew, make sure your edges all stay lined up nicely. You will also need to give a gentle tug at your fabric to match the three fabrics. Your tail/cover up will be wider than your skirt and waist band, so stretch as you sew to make it all work, as I am doing in the photo below...


10) Finishing the arms!
I chose to use a bias tape to finish the arm holes by using the same fabric I used for the cover-up of my garment. I cut two, 2" strips of fabric to do this.

I then folded the strips in half, and pinned them around the arm holes, matching the raw edge of the bias tape with the raw edge of the arm hole. I used a 1/4" seam to sew the bias tape onto the mermaid tail side of the garment. If I was REALLY good, I would have first sewed my bias tape into a loop that fit the arm hole, but instead went with the difficult task of fussing with it AFTER I sewed it on. I recommend you sew a loop first. The nice thing about using jersey knit for this, is that it allows you to stretch it!!! So it is much easier to work with than the usual cotton bias tape.

And here I'm sewing the bias tape onto the arm hole.

Once your bias tape is sewn on the one side, find a nice relaxing place by the pool and hand sew the bias tape by folding it over the raw edge and stitching it in place on the cover-up side of the garment.

Here is the finished arm hole...

11) Last, but not least... fastening the hood!
Now we need to find a way to take the tail fins when the garment is worn as a cover-up, and attach them to form a hood.
Ok... I'm not exactly sure how best to pull this part off. I chose to go with these large snaps for one of the two cover-ups I made. I thought the little snaps were too small to do the job, but the large snaps aren't pretty to look at.


See what I mean???
So I thought... maybe I could add some ribbon flowers by sewing a corner of each to "hide" the snaps when the garment was worn as a tail...


I'm still not sure that I like the end result of that, though the flowers were a nice touch. Perhaps you have a better idea? I didn't think the velcro would look all that pretty on the tail fin either. Perhaps some pretty buttons would have been the best choice. I may go that route on the second garment.
To decide where to place the "closures" of choice, have your child try on the garment. Fold the fins over your child's head to form the hood, and select four places that would be best to hold the hood together. I chose two points along the front of the hood, and two other points on the back. You can get a better idea where I decided to connect the hood by looking at the snap image above.
There you have it....
My girls LOVE them!!


If you are brave enough to try this one, I would LOVE to see how yours turns out!!!!
Please share!!!


No comments:
Post a Comment