Popular Posts

Homemade Granola Bars

I know there are dozens of homemade granola bars out there, but I thought I'd share our favorite!  I've been making this recipe since we moved to China.  Granola bars are hard to find, and often hard as a rock when we do find them!  My kids LOVE these, and they are really simple to make.

Don't they look yummy?
My 8-year old wants me to add that they are "Delicious!"

**ALLERGY ALERT**
Yes, I know many of you will ask if this recipe contains nuts.  It does (in the form of peanut butter).

Ready to make a batch?

Throw your dry ingredients into a large bowl.  Rice Krispies, oatmeal, flaxseed and cinnamon (both optional).  Toss until blended.

I like to line a 9"x13" baking dish with wax paper.  My kids like chocolate on their bars, so I spread some chocolate chips on the bottom of the dish ahead of time.
(You can substitute regular chocolate chips here... I just usually use the mini.)

Place honey and brown sugar in a medium sauce pan.  Heat to boiling over medium heat while stirring constantly.

Once boiling, remove from heat.

Add peanut butter and vanilla to your sugar mixture.

  
Stir until well blended.

Pour your peanut butter/sugar mixture over your dry ingredients.

Acting quickly, gently blend until it is well combined.

Pour your granola mixture into your prepared dish (the one with the wax paper and chocolate chips).  Use a spatula to spread the mixture evenly.  I like to add some sprinkles over top at this point.  I made a second batch (on the right) with sprinkles for Valentine's Day.

  
Use your spatula to firmly press your granola mixture down so it is nice and compact.
Set the pan aside to cool completely.  I like to give it an hour or so.  I've placed it in the fridge in the past, but if it gets too cold, your bars are more likely to crack when you cut them... so be careful not to leave in the fridge for too long.

(I'm annoyed with this photo.  It will not rotate for me!!!)
When your granola is cooled, transfer to a cutting board.  This is how I like to cut my bars.  I try to get 16-18 bars cut with each recipe.

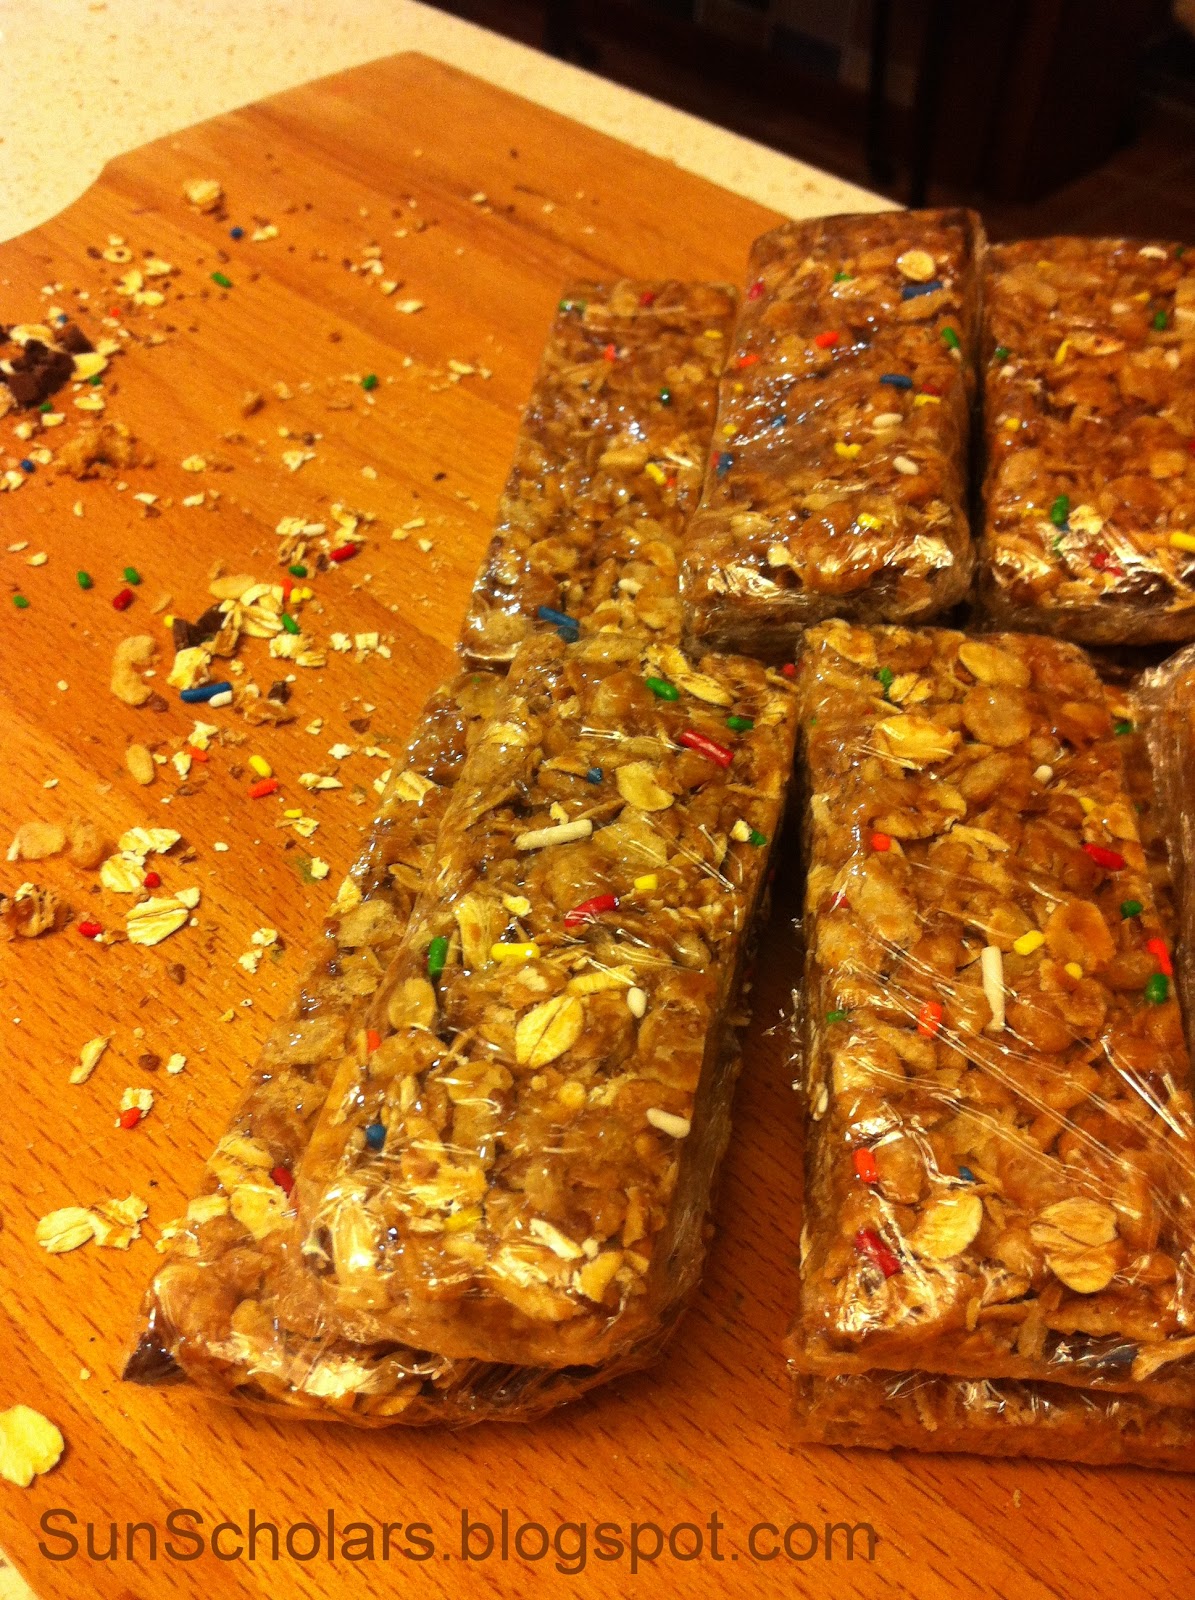
Wrap them up with plastic wrap, and toss them in the cupboard so they are ready for school lunches or snacks!

Happy Snacking!

Heart Felt Pocket Warmer Tutorial


Valentine's Day is drawing near, and many of us are sitting in some pretty cold temperatures this time of year. 

Not long ago I came across these on Etsy (created by WormeWoole)...
Pocket Hand Warmers Fleece VANILLA CREAM Hearts Eco Friendly by WormeWoole

These adorable little fleece hearts are re-usable pocket warmers!
With three kiddos on the go, I thought these would be the perfect thing for our cold morning runs to school.  Pop them in the microwave for 25 seconds, toss them in their pockets, and we're out the door.

So simple to make.... are you ready??

Supplies Needed
- Fleece, I used 4 - 4" x 3.5" pieces for each pair
- Thread
- Rice, about 1/3 cup for each pair
Optional: Pinking Shears, Funnel

Directions

1. Cut your hearts!  I made a paper pattern by folding a piece of paper in half and shaping it until I was happy with the result.  My heart pattern was approximately 4" wide and 3.5" tall. Then I cut out all of the hearts I needed from the fleece.  You will need 4 fleece hearts for each pair.

2. Start Sewing!  Match two hearts, back-sides of the fabric together, and stitch around them as you see in the photo above.  Make sure to leave a small opening!  I used a 1/4" seam allowance.

    
3.  Fill 'er Up!  I found it helpful to use a funnel to add the rice to each pocket warmer.  Fill them with as much rice to get a fairly plump result... but don't go over-board!  The more rice inside, the harder it will be to sew your opening closed!

 4.  Close it Up!  You might want to hand sew here... I don't have time for that sort of thing!  I held things together and ran the fleece through the machine to sew my opening closed.  Here's proof that I'm not perfect ;)  See what I mean about stuffing these full of rice?

5.  Trim Your Edges!  Ok, so this isn't necessary... and if you don't own a pair of pinking shears, skipping this step isn't going to make these any less functional.  I just thought a little edge would dress them up a bit.

.. and Viola!!

How To Use
Pop these in the microwave for 25 seconds, and stick in your pockets for up to an hour of warmth.  Be careful NOT TO OVERHEAT, as these can get very hot.  Test them out before you pass them onto your little ones.  They can be used over and over again.  Just keep dry!

The Downside... they aren't washable... but being so simple and inexpensive, they are easy enough to whip up when you need a new pair.

I made a pair for each of my kiddos...

My daughter says they make nice eye-warmers too.  Perhaps mom can use these when she puts her feet up!

Super simple!  I'm thinking these would make some pretty sweet little Valentines.
What do you think?

For the Kids Friday #47


Welcome to this week's party!
Sorry to keep this one short and sweet.  I am enjoying some time in Beijing with my family.  I'll catch up with a double load of features next week.  Thanks for sharing!!

For the Kids Friday


1)  I would LOVE for you to first be a follower of my blog.  (And why wouldn't you want to be?!)

2)  Grab my For the Kids Fridays Button and place it somewhere on your blog.  Be sure to link back to me!

3)  Link up as many KID-RELATED activities, games, recipes, parties, gifts, clothing you've created, crafts, traditions, lessons, and so on... that you would like to share.  Please add a different link each week.  They can be old or new... this is just a place to share ideas for our kids to enjoy.  Bonus points to those that serve some educational purpose too!  Link must be to the specific post, and not your general blog page.  Please don't link to your store.

4)  Share the love and comment on at least one other link.  Everyone loves to get feedback.


That's it!  Have fun, and thanks so much for participating!

More Valentine's Day Fun Inspirations

Looking for some more Valentine's Day ideas?
There is no shortage of fabulous ideas out there!  Check out these ideas that have inspired me...


Hanging Valentine Tutorial
here at SunScholars

Valentine Day felt garland
on Etsy by Aidies Hideaway

Pull Their Heartstrings
at Martha Stewart

at The Lettered Cottage

at Teri Pettit

Heart_ornaments1_2
at Paper. Scissors, and Superheros

at Munchkin Munchies

at The Tomkat Studio

here at SunScholars

IMG_5054
at Alisa Burke

on Etsy by LoveFromChloe

at Cookies and Cups

IMG_7755.heartcake
at I am Baker

at Our Best Bites

at The Party Animal

Just Because 20 - ABC I Love You - IMAGE
at Sprik Space

An army of hearts!
shared on Flickr by Pavoreal


Papercraft Heart
at Mondocherry


Valentines Strawberry Hot Chocolate Recipe
at Best Friends for Frosting


Valentine Centerpiece Tutorial
at JesseKateDesigns

FortuneCookieFreebie1
Valentine Fortune "Cookies"
at Design. Wash. Rinse. Repeat.


Candy Wrapper (free printable)
at Less Cake {More Frosting}


Valentines Lunch
at Three Pixie Lane

DSC_1647
Valentine Gnomes
at GardenMama

Personalized Valentine Heart Strings Map Pillow for Valentines Day Gift Mother Sister Best Friend Girlfriend Boyfriend
Valentine Heart Strings Pillow
at Etsy by Felix Street Studio

Red velvet crepes
Red Velvet Crepes
at Duhlicious


Paper Flower Centerpiece
at The Decorista


Valentines Minute-to-Win-It
at Stacy Julian


Create Your Own Bokeh Tutorial
at DIY Photography

Pinned Image
Pancake Art
at Modern Design

Valentine Jelly Pops
at Tablespoon


52 Reasons I Love You
at Papervine


Valentine Heart Day Celebration
at Sheek Shindigs

Happy Valentine's Day!