Popular Posts

Back to School Inspirations

Can you believe it is almost that time again?
Where did the summer go?!

Well, I figured I'd better get a move on with the Back-to-School Ideas.
Check out these amazing ideas to help you and your kiddos prepare for the year ahead!


Back-to-School Pictures
at Mommy Minded


Notebook Paper Tote
right here, at Sun Scholars

 
at Mommy Minded

Back to School Treat
at The Blackberry Vine


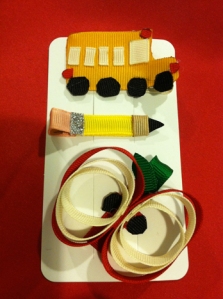
Back-to-School Hair Clips
at A Little More


Butterfly Bookbag Tutorial
at Taidye Original


Back-to-School Countdown Jar
at Everything Moms

 
Back-to-School Countdown
at Happy Home Fairy

 
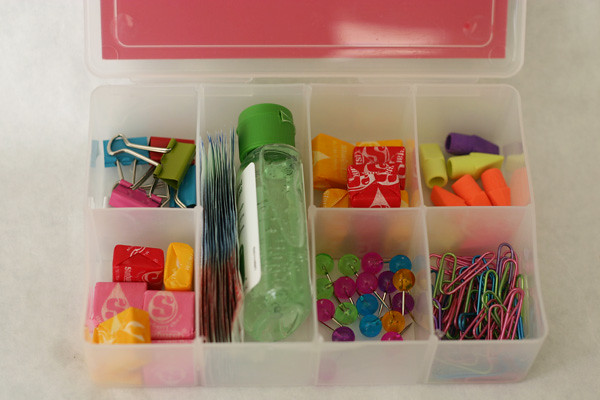
Back-to-School Survival Kit
at Everything Pink

kits inside
Teacher's "Aid" - First Day Survival Kit
at Bee in Our Bonnet


Lunch Bag Tutorial Round-Up
at Sew, Mama, Sew!


Lunch Box Love Notes
Right here... at Sun Scholars


Edible Crayons
at Gourmet Mom on the Go

Charlie Lola
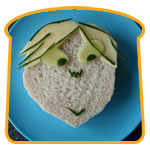
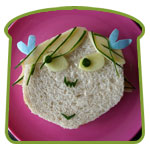
Fun Sandwich Gallery
at Funky Lunch


Back-to-School Themed Birthday Party
at Little Sooti

teacher-candy-bar-wrapper
Back-to-School Teacher Gift Ideas (with free printables)
at The Crafting Chicks


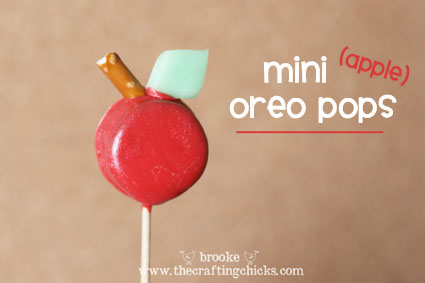
Mini Apple Oreo Pops
by The Crafting Chicks


Krispy Apple Treats
at Gourmet Mom on the Go

Fruity Fun Skewers Recipe
Top 20 Lunch Box Recipes
at Allrecipes

Bento Menu Library
365 Lunch Ideas
at Laptop Lunches

Healthy Lunch Box Ideas
at Fresh for Kids

Quick Recess, Lunch and
Snack Recipe Booklet
Edition 4
Quick Recess, Lunch and
Snack Recipe Booklet
Edition 3
Quick Recess, Lunch and
Snack Recipe Booklet
Edition 2
5 Day Healthy Lunch Box
Meal Plan
Edition 1


Kid Calendar
at The Fabulous Farm

Large image
Lambswool Green Pencil Scarf
at Folksy.com


#2 Pencil Nails
at The Daily Nail


photo
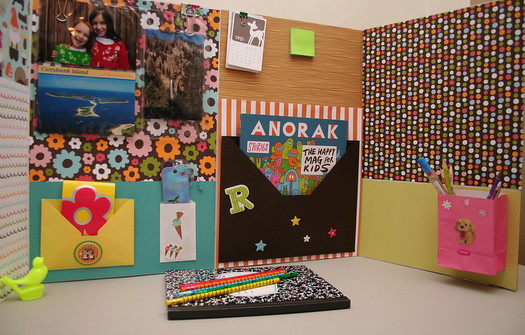
A Cozy Homework Corner
at Charlotte's Fancy


Book Cover Tutorial
at 33 Stitches


Wow... so many awesome ideas out there!
If you think you have one I should include in my list of inspirations, please let me know!


Happy Last Days of Summer!


For the Kids Friday #21


YEAH!!!  It's time for another For the Kids link party!  It is official!  We are in China and already connected!  We will be living in a hotel for a few more days, then comes the task of making our apartment on the 24th floor a home!  A big change from our life in Iowa!

I hope to share some of our new life with you all soon.  I also know that my craftiness will be put to the test!  I've visited the Chinese fabric market, so I think I'll be covered there.  There is nothing even close to a craft supply store here, from what I can tell.  But I will do my best to share with you all of the projects I manage to put together while we are here in China!

Ok... enough about me!  Check out these awesome posts shared at last week's party!  Thank you all for sharing each week.  I just LOVE seeing what you're doing.


Featured below?
If so... grab this button to share on your blog!


Sun Scholars


Slumber Party Snacks
at Hungry Happenings

Ready2Read Unit 1: Level 7
at The Moffatt Girls

Starfish S'mores
at Hungry Happenings
 
Ice Cube Painting
at Snails and Puppy Dog Tails

Little Nora Jane Twirl Dress Tutorial
at Whildflowers & Whimsy

money
Preschool Unit : Money Activities
at Preschool Alphabet

Hot Car Crayons
at Come Together Kids

Awesome!!!  Thanks for sharing!
... now show me what you've got this week!

This Week\


1)  I would LOVE for you to first be a follower of my blog.  (And why wouldn't you want to be?!)

2)  Grab my For the Kids Fridays Button and place it somewhere on your blog.  Be sure to link back to me!

3)  Link up as many KID-RELATED activities, games, recipes, parties, gifts, clothing you've created, crafts, traditions, lessons, and so on... that you would like to share.  Please add a different link each week.  They can be old or new... this is just a place to share ideas for our kids to enjoy.  Bonus points to those that serve some educational purpose too!  Link must be to the specific post, and not your general blog page.  Please don't link to your store.

4)  Share the love and comment on at least one other link.  Everyone loves to get feedback.


That's it!  Have fun, and thanks so much for participating!


Chocolate Chip Cookie Ice Box Cake

Ever thought to make a cake out of your favorite chocolate chip cookies?

Check this out....


My inspiration...
at Martha Stewart

Isn't it awesome??
When I saw this, I knew I HAD to make one for myself.  With a fun little twist that is.


This was SOOOO simple to put together.
Directions are included at Martha Stewart's site http://www.marthastewart.com/353835/chocolate-chip-cookie-icebox-cakeHERE...
I'm adding my version below.


Ingredients:
- About 9 dozen Chocolate Chip Cookies (I added some Smarties/M&M's to mine for more color)
- 4 Cups Heavy (Whipping) Cream
- 8oz Mascarpone Cheese
- 2 Tbsp Sugar
- Food Coloring
- Sprinkles/Chocolate Shavings/Candy for Garnish

Directions:
1) Whip 3 cups of heavy cream with the mascarpone cheese and 2 tbsp of sugar until you get peaks.

2)  Lay cookies down on a large plate or platter to form your first layer.  I used 9 cookies per layer, as shown below.

3)  I scooped out 1 cup of my whipped cream mixture into a separate bowl for each layer, and tinted it with food coloring.  For the first layer, I tried to get a light purple.. as you see in the image above.  Be careful not to over whip your cream with the food coloring.  I tried folding the color in so not to lose the consistency of the whipped cream.

Spread the tinted whip cream over your cookie layer.  I found it worked best to spoon the cream onto each cookie on the outside layer and spread it towards the center, so that the colored cream left a nice presentation on the outside of the cookie cake.

4) Repeat steps 2 and 3 until you have about 9 layers of cookies (ending with a layer of cookies).  I tinted each layer of whip cream to make a rainbow... purple, blue, green, yellow, orange, red, and white.  Afterwards, I had wished I started with a pink layer of whip cream then went to purple so I didn't end with white... but I was still happy with the results.


And here it is all layered ...

5)  Cover with plastic wrap and place in the fridge until you are ready to serve.

6)  To serve, whip up the last cup of cream (I added a little sugar to mine).  Pile the whipped cream on top, and add the garnish of your choice.

.... ready for it??


 We used it to celebrate three little summer birthday girls.


And after it was attacked with the knife...

Yeah, one GIANT chocolate chip cookie... basically.

After letting it sit in the fridge with the whip cream layers, the cookies soften up to where you can cut it like a cake.

MMMMM!