


This little strawberry sundress
got LOTS of attention around town today.

To pull this idea together, I used THIS FABULOUS tutorial...

found at LBG Studio
.... with my own little embellishments, of course.
Since Vanessa's tutorial is so fabulous, I'm going to refer you to her blog for the details on making these adorable little pillowcase dresses. She even offers a printable pattern!
However, here are the things I did differently to create my version.
Supplies I Used:
- Red Cotton Fabric
- Green Cotton Fabric
- Thread, red & green
- Green Ribbon, 3/4" thick
- Black Knit Fabric
Directions:
For my dress, I wanted to have green on the top, and red on the bottom, so I cut the fabric as shown below. (I didn't use the pattern, but was doing it freehand. I later went in and made my arm curves deeper then you see below.)

Next, sew your green to the red fabric so you have your front and back pieces of your dress.

For the rest of the dress I followed Vanessa's directions for a Fabric Tie Casing Dress. I used my green fabric to make bias-tape to edge the arms, and used the green ribbon to thread through the casing.
1) I added a ruffle of green ribbon between the red and green fabric. I did this by gathering the ribbon with a hand-stitch and pinning it in place. I then stitched the ribbon down the center onto the dress, and removed my hand stitching.
2) Last, I added the seeds. I used the same technique I used for my watermelon skirt below. I've copied and pasted those instructions here, so ignore the fact that I'm showing you a skirt here and not the Strawberry dress. :)

I found a cup in the cupboard and used it to create a pattern. I then cut a stack of circles from my black jersey knit. I think I used 20 for the smaller skirt. I am not sure yet, but I may add a third row of seeds to the larger skirt (haven't finished it yet).


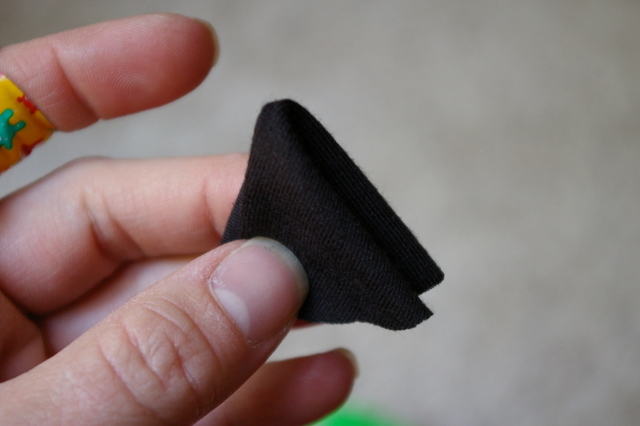

Sorry for the crummy photos. The bad lighting and red fabric really didn't work in my favor here. Next, sew on each of your seeds by adding a stitch, back and forth a couple of times, to the top of each "seed".

I went from "seed" to "seed" without stopping, and cut all of my threads between at the end. That saved a bit of time.
And here is the finished dress!


Happy Sewing!


No comments:
Post a Comment